
By Billy Metcalf
© 2000

I’ve been brain-tanning deer hides for about fifteen years. I collect about 150 hides a year, mostly from meat cutters who cut wild game for hunters. Some I get directly from the hunters themselves. Most of the hides that I get are skinned well, but could be better, a few are excellent and a few are sliced up and worthless.
Unfortunately the man who showed me how to efficiently take a hide off a deer has retired now. He was great to watch. He used his whole body to do it: his hands, his elbows, his knees, even his feet. He told me, that as a meat cutter who gets paid by the pound for cut and wrapped meat, his main concerns when skinning were to get it done fast and to leave as much meat on the animal as possible. And for me as a tanner his hides were great to work with because he pulled the hide off — instead of cutting it off with a knife. Which means a clean hide with no knife marks or holes.
The two main points I want to make are:
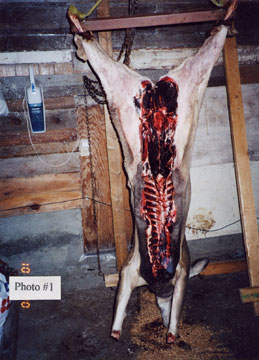
This first picture shows a Mule deer hanging, ready to be skinned. Before hanging, the deer was field dressed and the lower part of the back legs were cut off below the main joint with a meat saw and the skin pealed back to expose the big leg tendon that we hang the deer from. Then after the deer was hung, the incision from the field dressing was extended up past the throat. The breast bone and wind pipe were removed to facilitate cooling the meat. The lower part of the front legs were removed at the knee joint as well.
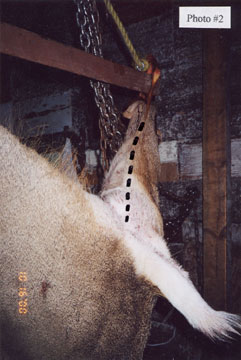
Photo #2 shows where to make the incision on the back legs. Start at the anus or just below, and cut right up the line where the hair changes color to the tendon that the deer is hung from. Then repeat on the other leg.
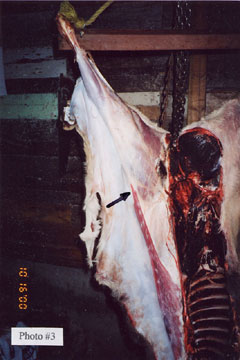
Now put your knife away. The next step is to peal the skin back from the inside of the back leg and all the way down the length of the belly and chest incision (photo #3). Make sure that you have the skin separated from the meat. Be particularly careful where the arrow is pointing. The meat really wants to stay with the skin here, now is the time to separate them.
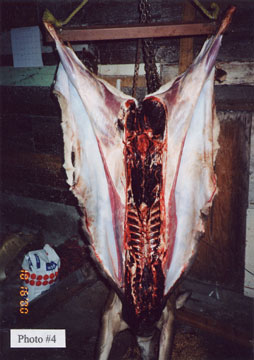
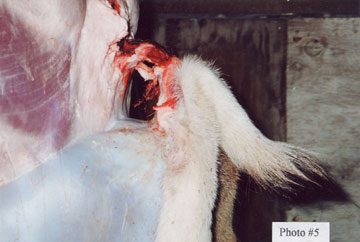
Photo #4 shows both sides pealed back and separated from the meat, all along the length of the belly incision up to the chest between the front legs.
Now turn the deer around and peal the skin back from the outside of the back legs to just below the tail like in photo #5. Wrap your fingers tightly around the base of the tail and slide them out to the end of the tail, pushing the skin off the end in front of your fingers.
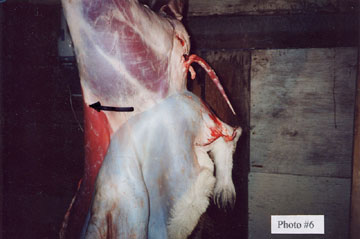
Either the tail will turn inside out and come off the bone or it will stay right side out like in photo #6. You don’t need to split the tail skin first. You can do that very easily later. Again keep an eye on the area where the arrow is to be sure the meat isn’t sticking to the hide.
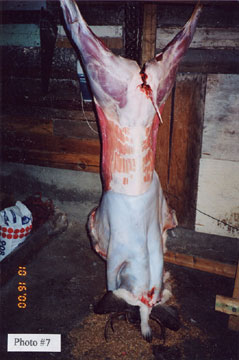
Now we’re ready to make some serious progress. Two good pulls and we’re at photo #7. See how cleanly that hide is coming off. A couple more pulls and we’re around the front shoulders.
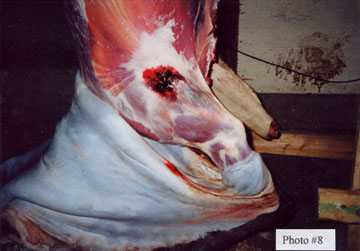
Now separate the hide from the meat along the edges of the incision going up towards the neck until you’re at least past the front legs a few inches. Work the hide loose from around the shoulders like in photo #8.
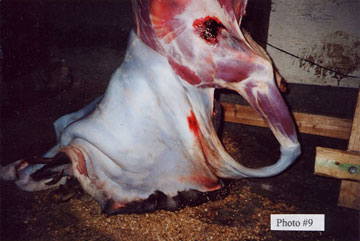
Then pull the leg inside out until it comes off the end of the front leg like in photo #9. Some people put their foot in there like a stirrup and stand on it to peal the front leg off. Remember we haven’t made any cuts on the front legs, they’re still in tubes.
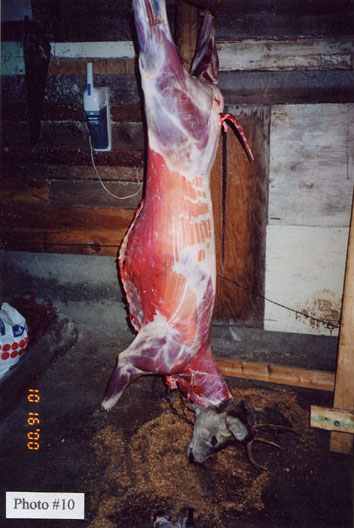
Now work the hide free up the neck to the base of the ears and cut it off. All of the meat is on the animal. Some people might think that the flank meat is no good but it makes good hamburger an sausage. If you’re a meat cutter who cuts 200 deer in a season, you could get an extra 200 lbs of meat, or more, by skinning clean and leaving that meat on the animal. (photo #10).
In photo #11 we see the hide as it came off the deer.
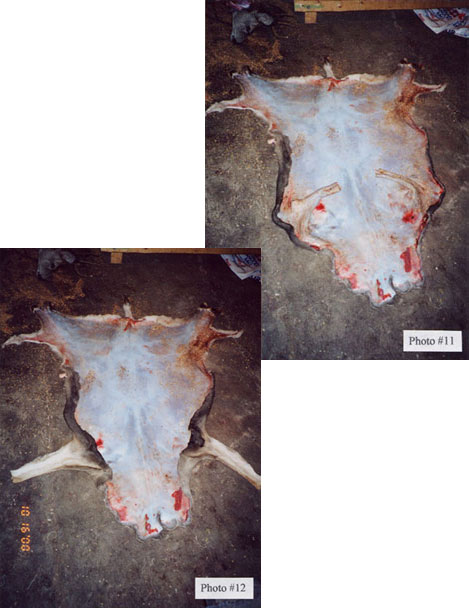
We need to turn the front legs right side out now (photo #12)….

….and then open them up by sliding our knife up the front of the inside of the leg. (photos #13 and #14).
The line I’ve drawn in the picture shows where the cut will go across to meet the chest incision. Try to match the cut on the other leg to make the hide symmetrical. Now is the time to split the tail and trim off any little bits that may be sticking out more than you want.
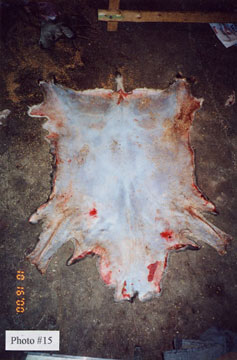
Photo #15 shows the finished skin ready to be salted or frozen or tanned. Not much fleshing to do here. The time it took to skin this deer was 15 minutes, including stopping to take the pictures.
Before I leave you, I’d like to point out a few of the mistakes I see people make when skinning that make the difference between a good hide and a really nice hide.
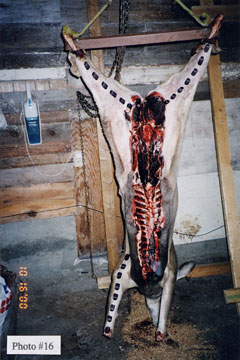
First, a lot of people will make the incision on the back leg where I’ve put the black line in photo #16. This is probably because it’s easier to reach when the deer is hanging than making the cut up the back of the leg. What that does is make an irregular edge along the bottom and it puts about three or four inches of thin, weak skin along the bottom of the hide. Although this isn’t a huge problem, if you frame soften your buckskin those holes along the bottom will be much more likely to tear out while you’re stretching the hide.

Next, many good skinners will not get this area (photo #17) separated good enough before they really start pulling the hide. Then they will go back with a knife to separate it after the meat has already started to come off with the hide. The skin is very thin here and a knife score is very likely to be a hole by the time the hide is tanned.

This last mistake is very common, even with otherwise excellent skinners. Many people will cut the front legs up the back, like I’ve shown with the black line in photo #16. I guess they are making the cut while the deer is hanging, before they pull the hide off, and this is the easier side of the leg to get at. What this does is create a large indentation just behind the front legs that gives the hide a sort of hourglass shape, like the hide in Photo #18. The skin is weak here and many times I’ve had the skin start to tear here when wringing the hide. I’ve never had a hide tear from wringing that was cut farther forward on the front leg.
If you want to cut the front legs before skinning, it’s best to do it before you hang the deer. After you remove the lower leg, cut up along the inside of the front of the leg from the knee joint, to where the leg meets the chest. Then cut straight across the chest, making sure the cuts from either side meet in the middle.
This method of skinning will save you time and effort at the fleshing beam, and give you hides that will roll up smaller to put in the freezer or store better salted. It’ll give you the most usable square footage per hide, as well as putting the most meat in your freezer from each deer.
Compare the shape of this hide (the one I skinned in the article), to photo #18. This is the shape I like!