
By Vaughn Terpack, © 1998
This article originally appears in The Bulletin of Primitive Technology Vol. 16
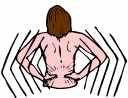
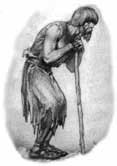
Who amongst us has not tasted that sweet agony after an hour spent working at the fleshing beam? Who does not recognize the hunched over form of a tanner who’s muscles have locked up? We know the effect. What is the cause?
To understand why every beam user experiences lower back pain, you first have to look at the human body. The pain always occurs in the lower back because the constant straightening of the spine is done by the small muscle groups located in the small of the back. These small muscles cannot grow to accommodate the workload, no matter how often they are exercised, and so give signals of pain to let you know that they are being abused and do not appreciate it
To flesh a hide, the standard method entails locking the arms into a straight or semi-straight form and then leaning forward using the weight of the body to push the meat and fat off. At the end of the stroke, the back muscles pull the body into an upright position ready for another cycle. Repeated time and again, this motion wears out the small muscle groups in the lower back causing pain and cramping. The idea is that gravity does all the work, but what seems like a boon is truly a bane.
To stop spinal flex, raise the upper end of the beam so that it impacts the body midway between the navel and the base of the sternum. This stops the spine from bending and places the effort of fleshing on the large muscles of the upper torso, the Latisimuss dorsi, Trapezius, Deltoids, Pectorals, Biceps, and Triceps. These muscles are larger to begin with and can grow to take the strain: look at a bodybuilder.
Because you cannot raise the upper end without increasing the length of the fleshing beam, it makes sense to raise the lower end as well. This is easily done and has the added benefit of decreasing the pitch of the beam, further reducing the need to bend the spine.
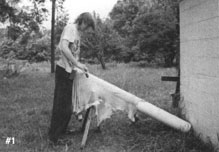
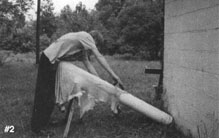
In photo # 1, you see the beginning of the standard method with the beam’s upper end impacting below the navel. At the end of the stroke, photo #2, the flex of the spine is clearly demonstrated and severe. Though his arms are extended rather far, hanging over the beam like this is not out of the ordinary.
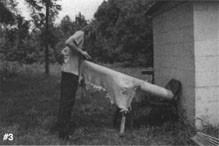

By raising both ends of the beam, the bending of the spine becomes nominal. In photo #3, the tanner starts out with his back straight and uses the muscles of the upper body to scrape the hide. Even after he has extended his arms, (photo #4) to the point that he has no control over the drawknife and can exert no pressure to clean the hide, the angle of his back is not much different than when he was in a full upright position.
In both positions. the straight edge of the telephone pole in the background clearly shows the difference in angles. Using a protractor on the photographs, with the pole as a baseline, photos 1 & 2 showed a difference of 34 degrees (17 degrees and 51 degrees, respectively). Photos 3 & 4 showed a difference of only 11 degrees (24 degrees and 35 degrees, respectively). The less bending of the spine, the less trauma to the smaller muscle groups and the less pain for the tanner.
Does this change in beam position eliminate back pain? Absolutely and completely. After fleshing three hides in a row, the only thing I felt was a tightness in the upper back and chest similar to what you would get from a healthy workout. It in no way affected the rest of the day’s activities and by the next morning was completely gone. In fact, my feet hurt more from standing so long.
The changes made from the standard position are few and the benefits many!